
Our Turtles
- Susan: RoboCruz (after our favorite graffiti/comic artist/collaborator Sharon Lee De La Cruz from the Bronx!)
- Tracy: Cynthia
- Erik: Drawson
- Josh: Seymour
- Erin: Clovie
- Brian:
Instructions, Bill of Materials, and Assembly Directions
Instructables: Original Instructions
- zackboston: What is a little confusing is that there are actually two tutorials.
- One really compact one that uses the Adafruit Trinket: http://www.instructables.com/id/Low-Cost-Arduino-Compatible-Drawing-Robot/
- Another that uses an Arduino Uno: http://www.instructables.com/id/Arduino-Drawing-Robot/
- Since I googled "arduino drawing robot instructables" and did not realize this until later, I printed out the parts for the Arduino Uno one --- all the parts are in one Thingiverse file. I wonder if everything but the base is the same in terms of printing parts? I'd like to try the smaller one because I also have a Trinket 3V. All the parts are in separate files for the Trinket one. hmmmm. I guess I just have to print out a trinket chassis and see. . .
- The Makersbox dude wrote back and said, "The Arduino chassis has extra space and standoffs for the Arduino board. It will work fine for the Trinket. Everything else is identical."
Parts:
- Missing Capacitor:
- Also there is a capacitor in the picture of the parts at the beginning that is never used. Weird. (sk: the capacitor was part of the Arduino Uno version of the drawing robot in the link above --- I think he designed the Arduino Uno instructable first, then copied and edited for the Trinket instructable!)
- The nice Makersbox dude wrote me back on the comments and said: " The Trinket runs on 3.3V, and didn't really need the capacitor. " zackboston
-Missing power switch
- I actually desoldered a switch from some old circuit board from a printer or something but it's anything like this, as long as the pins are breadboard friendly: https://www.radioshack.com/products/dpdt-6vdc-slide-switch-1?variant=5717494213

- I can't tell if this one does fit into a breadboard, there is no information. Here is another one, side facing: https://www.radioshack.com/products/dpdt-6vdc-slide-switch?variant=5717494021
- Too bad Jameco doesn't have a brick and mortar in every city: http://www.jameco.com/webapp/wcs/stores/servlet/Product_10001_10001_161817_-1 Erik
- Ima gonna try this one, even tho it is not recommended for breadboards, because I have some around:
https://www.sparkfun.com/products/9609 zackboston
- The nice Makersbox dude wrote me back in his comments and said, Sorry about the switch. You are the first person to catch that. I use a SPDT EG1218 slide switch (https://www.digikey.com/product-detail/en/EG1218/EG1903-ND/101726), but I bet this RadioShack one would work (https://www.radioshack.com/products/dpdt-6vdc-slide-switch-1?variant=5717494213), or you could just wire it straight and remove a battery to turn it off and on. zackboston
- Missing 2x M3 x 8mm pan head screw
Build and Assembly Suggestions:
- 3D printing. On the Makerbot 2.0, I used Standard, 0.3mm, 2 shells, no raft for printing. On the Ultimaker, I just used the settings recommended by the Ultimaker. zackboston
- I did the same settings using ABS on a Thing-O-Matic: .3mm layer height, 2 shells, 15% infill. Josh
- Insert the steel 5/8" ball bearing as soon as the 3D printer stops for an easy, perfect fit. Josh
- My ball bearing won't rotate easily --- tried some WD 40 but that did not help. I may actually print another that is .5mm bigger to try to get more wiggle space for it to rotate in the cup. zackboston
- My ball bearing rotates OK, but I notice when the robot is running the bearing does not actually rotate but is dragged. It does not affect the accuracy but does contribute to the degradation of the path over time. Josh
- I used a heat gun to warm up the chassis on a cold cement floor so the nuts fit into the slightly too small on my 3D printer holes. Josh
- I found I could pull the nuts into the holes by tightening the screws. Erik

- Caster holes in chassis are in the wrong place for battery holder to fit. Drill new holes. (Yeah, someone pointed that out on the Instructable. I thought the STL might have been updated but I guess not.)

- I used elastic hair bands in place of the O-rings in the Instructable. I'm finding in use that they slip sometimes and would like to get the O-rings. Erik
- Josh sent him 20
- I added an LED (UV!) for debugging. I was trying to do something and without Serial communication you don't get any feedback from the robot, so I added LED blinks to see where it was in the program. I wired it from the anode in trinket pin 9, stretched over to a 330ohm resistor in a couple free rows toward the middle, then from the resistor over to the ground row. Erik

- Make sure that when the servo is in the down position that the pen holder rests on the robot's pen holder flush. If the pen holder on the pen is not in contact with the robot the lines will have weird backlash as the robot changes direction and the lines will not look beautifully crisp. The green lines in the example below were drawn without contact with the robot, the red with contact. Notice the line segments after the 45° turns. Josh

- Consider using a small piece of wood between the 3D printed stepper motor mounts. This reduces the amount of bowing in the chassis and helps keep the wheel base measurement consistent across turtles.

Calibration
Your calibration points are:
int wheel_dia=66.25; // # mm (increase = spiral out) 66.25
int wheel_base=120; //, # mm (increase = spiral in) 112
int steps_rev=128; //, # 512 for 64x gearbox, 128 for 16x gearbox
int delay_time=6; // # time between steps in ms
- I played with the wheel diameter without fixing the miscalibration. I changed the wheel_base=120 and got a perfect square that overlapped the rest perfectly. Josh
Usage
- Also, in the picture above you might notice an arc. I made an arcRight and arcLeft function so it can draw circles. I just isolated one motor out of the forward function so while one motor turns the other doesn't move, and doubled the "wheel_base" since it's a swing turn instead of a point turn. But you can give it a number of degrees of the arc to draw. So far there isn't a way to make a wider or tighter arc. That requires stepping the motors at different rates and I don't know how to do that yet. Erik
+++++++++++++++++++++
void arcLeft(int degrees) {
float rotation = degrees / 360.0;
float distance = wheel_base * 2 * 3.1412 * rotation;
int steps = step(distance);
for(int step=0; step<steps; step++){
for(int mask=0; mask<4; mask++){
for(int pin=0; pin<4; pin++){
digitalWrite(R_stepper_pins[pin], fwd_mask[mask][pin]);
}
delay(delay_time);
}
}
}
void arcRight(int degrees) {
float rotation = degrees / 360.0;
float distance = wheel_base * 2 * 3.1412 * rotation;
int steps = step(distance);
for(int step=0; step<steps; step++){
for(int mask=0; mask<4; mask++){
for(int pin=0; pin<4; pin++){
digitalWrite(L_stepper_pins[pin], rev_mask[mask][pin]);
}
delay(delay_time);
}
}
}
++++++++++++++++++
Erik

- Example of Erik's code on Josh's Turtle
- Here is a block of code to draw an octagon flower. Josh
++++++++++++++++++
void loop(){ // draw an octagon flower
pendown();
for(int x=0; x<10; x++){
for(int x=0; x<8; x++){
forward(50);
left(45);
}
{
left(36);
}
}
penup();
done(); // releases stepper motor
while(1); // wait for reset
}
++++++++++++++++++

Troubleshooting
- If the turtle does not seem to be acting right, your batteries may be low. Mine would not run procedures as they were written. Changing the batteries fixed the issue. Josh
Taking it Further:
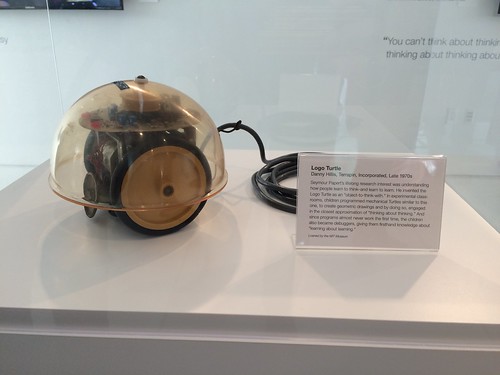
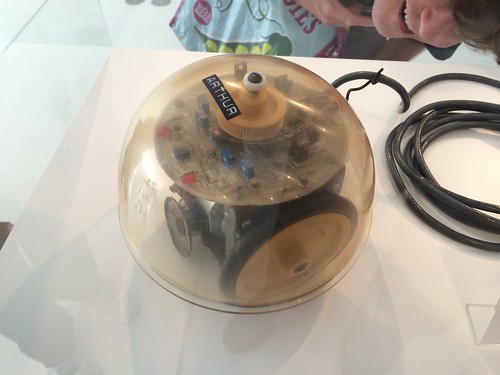
- Vacuum formed turtle "shell" like the Terrapin Inc.version from the late 1970s.
- Terrapin Inc was a small company founded by Danny Hills, Margaret Minsky, and Brian Silverman.
- Adding more turtle draw functions for the Arduino Code. I've got a nice Wentworth Institute of Technology work study who would LOVE to do this, so send your ideas and he will add them to the code. . . zackboston
- Josh suggested Repeat [ ]
- Josh would also like to see the ability to define a procedure: to square repeat 4 [fd 100 rt 90] end
- Add the ability to use different drawing mediums
- Hopper full of sand
- Spray paint
- Water colors
- Run ArduinoLogo on the hardware
- Sensors
- Touch
- Light
- Microphone
- Tilt
- Accelerometer